
Table of Contents
- Why Rollup Banners Remain a Trade Show Essential
- Standard Rollup Banner Sizes and Display Dimensions
- Choosing the Best Material for Rollup Banners
- How to Assemble a Retractable Banner Stand
- Retractable Banner Design Tips for Maximum Impact
- Maintenance, Repair, and Sustainable Options
- Conclusion: Choosing the Right Rollup Banner
- Frequently Asked Questions
Last Updated: September 8, 2026
Why Rollup Banners Remain a Trade Show Essential
A rollup banner is a portable display system with a graphic printed on flexible material that retracts into a base cassette. Despite the rise of digital screens, these banners remain a fixture at exhibitions and conferences because they deliver full-colour branding in under a minute with no power source or technical support required.
At IL-ĦSIEB KOLLOX, we offer custom printing services. One person can carry the entire display in a lightweight case, assemble it in moments, and pack it away just as fast.
Trade show signage needs to work the moment it is set up, and rollup banners are among the most dependable formats available. Below, we cover the sizes, materials, assembly steps, and design choices that determine whether your banner looks professional or forgettable.
Standard Rollup Banner Sizes and Display Dimensions
Choosing the right size is rarely about picking the biggest option. The most common rollup banner size is 850 mm wide by 2000 mm tall, a format that fits comfortably within a standard 3-metre booth bay without overwhelming the space or blocking sightlines.
The 850 mm width is a baseline, not a rule. Many suppliers offer a wider 1500 mm by 2000 mm format, best suited to corner booths or as a backdrop behind a reception desk. The trade-off is portability: the cassette and graphic are heavier and require a larger carrying case that may not fit in smaller vehicles.
Compact tabletop banners (typically 600-800 mm wide and 800-1000 mm tall) serve a distinct purpose. They are designed for countertops and registration desks where eye-level engagement is key, so the design should prioritise detailed information over bold, long-distance headlines.
A less common but valuable format is the extra-tall banner, often 850 mm by 2200 mm or 2300 mm. These are designed for venues with higher ceilings or for use on raised stages where a standard 2000 mm banner would look stunted. Before ordering an extra-tall size, verify the ceiling height at your venue and consider the sightlines from the audience's perspective.
| Banner Type | Typical Width | Typical Height | Best For | Key Trade-off |
|---|---|---|---|---|
| Compact tabletop | 600-800 mm | 800-1000 mm | Counters, small displays | Limited long-distance visibility |
| Standard rollup | 850 mm | 2000 mm | Most trade shows and events | The safe, versatile default |
| Wide format | 1500 mm | 2000 mm | Corner booths, high visibility | Heavier, more cumbersome to transport |
| Extra-tall | 850 mm | 2200-2300 mm | High ceilings, stages | Requires venue height verification |
A crucial detail many buyers overlook is the difference between the overall frame size and the visible printable area. The cassette base is typically wider than the graphic, so your visible design area is often 10-20 mm narrower than the cassette width and stops short of the floor. Always request the exact printable area from your supplier before designing artwork.
Consider how the banner will sit within your booth layout. A single 850 mm banner is a supporting element, while two or three placed at angles create a more enclosed, branded space. Think about the banner's role in the overall composition before you commit to a size.
Choosing the Best Material for Rollup Banners
The best material for rollup banners is a blockout vinyl or polyester fabric that prevents light from showing through the graphic. Blockout fabric is the industry standard because it gives crisp, vibrant colours on the front while keeping the back clean, which matters when the banner is viewed from both sides or placed near bright lighting.
Standard vinyl banner material is durable and affordable, but it can develop a visible crease where it bends around the roller mechanism. Polyester fabric resists creasing more effectively and offers a matte finish that reduces glare under exhibition lighting. For most indoor display use, a 400-500 micron blockout vinyl provides the right balance of rigidity and flexibility.
Scratch-resistant lamination is worth considering if the banner will be handled frequently or transported between events. A matte laminate hides fingerprints and scuffs far better than a gloss finish, and it keeps the graphic looking fresh across multiple shows. Ask your printer about UV printing on the material you choose, as this affects how well the colours hold up over time. For guidance on materials and finishing options, the Print Industry Association's material guidance outlines the differences between vinyl and fabric substrates in detail.
How to Assemble a Retractable Banner Stand
Assembling a rollup banner is straightforward, but the exact process depends on the type of hardware you have. This section breaks down the three most common types of retractable banner stands and their specific assembly steps.
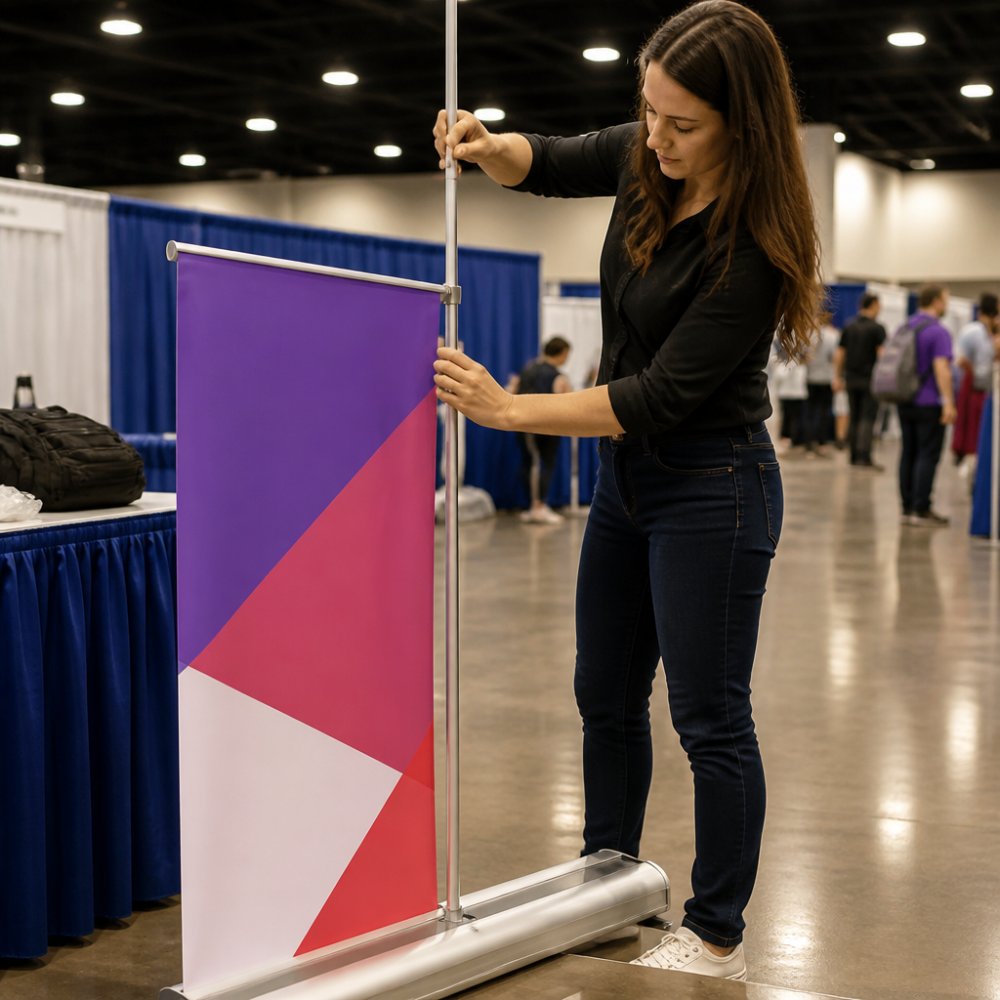
1. Spring-Loaded Roller (Automatic Retraction)
This is the most common and user-friendly mechanism. The graphic is attached to a spring inside the cassette, which provides tension when the banner is pulled out.
- Remove the banner and pole from the carrying case, and place the cassette on the floor with the graphic facing away from you.
- Grasp the top bar and pull the graphic upward steadily. You should feel resistance from the spring. Pull until the top bar reaches its full height and the internal lock engages. You will hear or feel a distinct click.
- Insert the telescopic pole into the mounting hole on the top bar. Extend the pole until it presses firmly against the ceiling or the top support of your booth frame.
- Adjust the tension by turning the feet or using the stabilisers. The graphic should hang straight and taut, without rippling at the edges.
- If the venue requires it, place weighted feet or sandbags over the base to prevent tipping.
To disassemble: Remove the pole first. Then, locate the release button or lever (usually on the top bar or the side of the cassette). Press it while gently guiding the graphic back into the cassette with your other hand. Do not let the spring pull the graphic in uncontrolled, as this can cause it to bunch up or crease.
2. Gravity Roller (Manual Retraction)
Gravity rollers are less common and are often found on budget or older models. They have no spring; the graphic is held up by a locking pin and retracts by gravity when the pin is released.
- Set up the cassette and pull the graphic up as you would with a spring-loaded unit.
- The top bar will lock into place using a pin or a friction catch. Ensure it is securely engaged before attaching the pole.
- Extend the pole to the ceiling for stability.
To disassemble: Remove the pole. Then, release the locking pin or catch. You must manually guide the graphic back into the cassette, as there is no spring to pull it down. If you let go, the graphic will fall freely, which can damage the material or the roller.
3. Curved or 'Eco' Banner Stands
These stands use a curved pole or flexible frame that arches the graphic for a more premium, 3D look. They often use a different locking mechanism, sometimes a simple hook-and-loop fastener or snap-lock on the top bar.
- Unfold the base and attach the curved poles.
- Attach the graphic to the top bar, which may clip or hook onto the pole structure.
- The graphic is often tensioned by the flex of the pole itself, rather than an internal roller. Adjust the pole's position to achieve a smooth, wrinkle-free curve.
To disassemble: Simply unhook the graphic and fold the poles down. These systems are often faster to set up and pack down than traditional rollers, but they require more care to avoid creasing the graphic during storage.
Common Assembly Mistakes and How to Avoid Them
The most frequent mistake is pulling a spring-loaded graphic too aggressively, which can overstretch the spring and cause uneven retraction. Pull steadily and stop as soon as the top bar clicks into place.
Another common issue is attaching the telescopic pole before the graphic is fully locked. If the graphic slips, the pole can scratch the print surface. Always check that the top bar is secure before extending the pole.
Retractable Banner Design Tips for Maximum Impact
Effective rollup banner design follows a simple hierarchy: a clear headline readable from three metres away, one strong visual, and a single call to action. Attendees scan booths quickly, so any element requiring close reading will be ignored.
Keep the most important message in the top third of the banner, as this is the area visible above crowds. Your logo should sit at the top or bottom consistently, and contact details belong at the bottom where they are easy to photograph. Avoid filling every centimetre with information; white space directs attention to what matters.
Typography makes or breaks a banner. Use a bold sans-serif font for the headline, keep body text to a minimum, and ensure strong contrast. A low-resolution image that looks fine on screen will appear pixelated at banner size, so always supply artwork at 100 DPI or higher at final display dimensions and request a proof before production.
Custom branding works best when it tells a story rather than listing features. A single compelling image of your product in use, paired with a benefit-led headline, outperforms a banner crammed with bullet points. For readability guidance, the Design Council's guidance on visual communication offers useful principles on layout and legibility for large-format displays.
Maintenance, Repair, and Sustainable Options
A rollup banner that is cared for properly will last for dozens of events. The most common problems are a graphic that no longer retracts cleanly, a bent pole, or a cracked base.
Clean the graphic with a soft, damp cloth and mild soap, avoiding abrasive cleaners. Store the banner upright in its carrying case, away from direct sunlight, as prolonged UV exposure fades inks. If the graphic becomes creased, hanging it overnight with a weight on the bottom bar usually removes the crease.
If the banner retracts too slowly or sticks, the internal spring may need lubrication or replacement. Many suppliers sell spare parts, and a basic repair is often cheaper than ordering a new display. Check the aluminum cassette for dents after transport, as a damaged frame affects how smoothly the graphic rolls.
Sustainability is becoming a deciding factor for many buyers. Look for banners made from recycled PVC or fully recyclable polypropylene, and ask whether the printing process uses eco-friendly inks. Some providers now offer fabric banners made from recycled PET bottles, which can be printed and then reused as replacement graphics on the same hardware. When the banner reaches the end of its life, separate the metal cassette and the graphic for recycling rather than sending the whole unit to landfill. the Environment Agency's guidance on recycling trade show materials explains how to dispose of PVC-based signage responsibly.
Conclusion: Choosing the Right Rollup Banner
Selecting the right rollup banner comes down to matching size, material, and hardware to how and where you exhibit. A standard 850 mm by 2000 mm banner with blockout vinyl and a spring-loaded cassette suits most businesses, while wider formats and fabric finishes suit brands that exhibit frequently or want a more premium look.
The real differentiator is the design. A well-executed banner with strong typography and a clear message outperforms a larger, busier display every time. Plan your artwork, request proofs, and think about how the banner will look alongside your other trade show signage before committing to print.
At IL-ĦSIEB KOLLOX, we help customers create custom products. Our custom printing services can bring your design to life with high-resolution output and durable materials. Get started with IL-ĦSIEB KOLLOX and make your next event one that people remember.
Frequently Asked Questions
What is the difference between a pop-up and a rollup banner?
A rollup banner, also known as a retractable banner, features a graphic that rolls down from a cassette at the top or bottom and is supported by a lightweight frame. A pop-up banner is a larger, collapsible display system made of interlocking panels that form a curved or straight wall. Rollup banners are ideal for portable marketing and quick setup at events, while pop-up displays create a much larger backdrop.
Are rollup banners reusable for different events?
Yes, rollup banners are designed for repeated use. The durable PVC or blockout fabric can withstand multiple setups and packdowns. The key to longevity is a quality retraction system and aluminium cassette. When your branding changes, you can often order a graphic replacement rather than buying a whole new stand, making it a cost-effective choice for long-term event signage.
How do I ensure my rollup banner design looks professional?
Focus on high-resolution printing and a clear hierarchy. Use high-quality source images (300 DPI) and keep important content away from the edges to avoid cropping. Choose a matte finish to reduce glare under bright event lighting. A clean layout with a bold headline, a concise message, and a single strong call to action will always outperform a busy design.
What should I do if my rollup banner graphic gets dirty or creased?
Clean the vinyl banner material with a soft, damp cloth and a mild soap solution. Avoid harsh chemicals that can damage the print. If creases appear after storage, hang the banner for a few days or gently use a low-heat hairdryer on the reverse side. Proper storage in the included carrying case will prevent most damage and extend the life of your display.